mmmmm Chili!
Its Winter – And as the mercury drops, our eating habits tend to change. Light, refreshing meals turn into rib-sticking stews and casseroles, and the summer salad is pushed aside for more robust dishes such as Short Ribs and hearty Pastas. Grills are covered up (Not in my house!) and crock pots are dusted off. You can set your clock by a habit of one member of my family – You know it’s winter when the Gin is put away and the Jack Daniels hits the Bar.
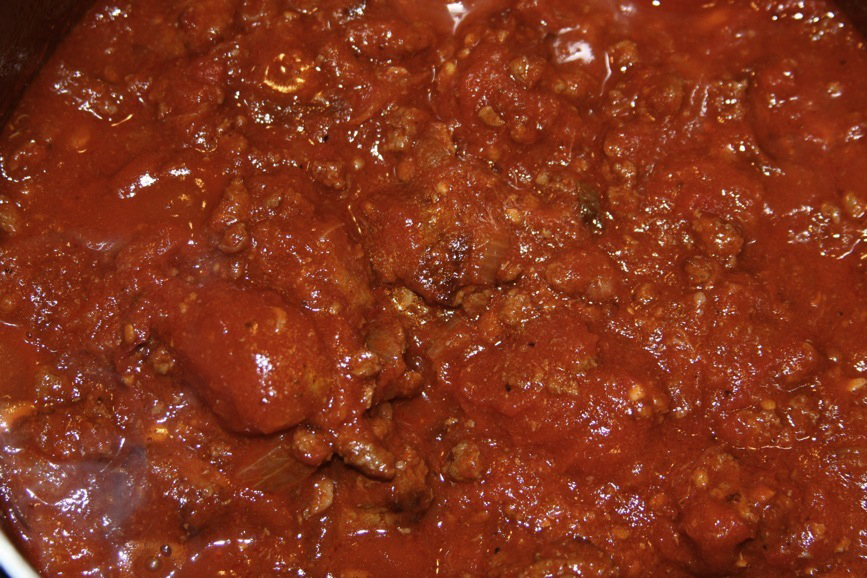
Invariably, what Winter means for me, besides my custom of wearing jeans instead of shorts, can be summed up in one word: Chili! Now I’m not the only male member of my species to get excited about whipping up a big ole’ pot of deliciousness – I think most men that cook enjoy making Chili – Is it Nature or Nurture? I tend to think its the former, as I think it is in our genes – After all, I don’t remember that chapter in my Man Manual. But just look at the number of chili cookoffs across the nation and you’ll begin to see how popular it really is and how varied the recipes can be.
Even President-Elect Obama, when recently asked by the Associated Press about his food habits, proclaimed Chili as his favorite food to make. To me, I think that is a good sign for the next 4 to 8 years. And, like every man, he probably has his own recipe and style to his chili – I know I do, and many men keep theirs a secret. Maybe after Obama gets settled in, he and I can have a mini-competition – We’ll have a blind taste-test, with the American Public voting on who makes the best pot.
I have no secrets – At least when it comes to my chili. Two people asked me what makes mine special the other day, so I decided to blog about it. After all, part of the fun is having other folks enjoy my food! And with my new iPhone, its easier than ever to show you photos. OK, Quick reality check here – How long until Tom mishandles the iPhone and it ends up on someone’s plate?
So here we go!
Step 1/Secret 1: MEAT
I use 2 kinds of meat, 1lb each – No, not different animals, and just to set the record straight, I don’t do some ‘Healthier’ version such as Turkey Chili – Yes, I HAVE done it in the past, but I did a lot of things in College I’m not proud of either. None of those things will ever be discussed at the dinner table or in a job interview. Maybe someday I’ll mix it up a bit and do a Beef and Pork chili (And I exclusively use pork for my Green Chile Stew – But thats another story) Add Veal to those 2 meats and we’ll have a Trifecta – a ‘Meatloaf Chili as it were….
2 different types of beef – Yes, ‘MOO’ for those of you who like ordering food by barnyard impressions. I like compounds of textures, so I’ll start something cubed (look for “Beef For Stew” at the market – Perfect! Although almost any cut of beef cubed would work. Try Brisket, Flank, Hanger, or Skirt for something with some ‘String’ to it). This I will usually cut into smaller chunks because some Butchers are lazy and their idea of bit-sized pieces end up being a half a pound! Toss cubes in some flour, salt, and pepper, and saute in a soup pot with some oil (I use olive) until browned.
Now any Celebrity Chef will step in here and say “Hold on there cowboy – Make sure you do this in 2 or three batches so as not to crowd the pan”. Whatever, dude – Now I’m even lazier than the butcher, so I’ll just throw everything in there, as long as it’s not too much – If there is more than 1 layer of cubes, then you probably should do it in batches. But what will happen is they will start to get browned until the juice starts coming out. At this point, I just pour off this juice into a small bowl and keep going. The pan will dry out and the meat will continue to brown – Add more oil if you like. Later on, when I add stock in the pot, I’ll throw in all those accumulated juices as well. Works for me, and I’m already adding the next ingredient while Martha is only on her second batch…..She probably learned that trick in Jail, since it’s a good way to kill time.
When that is all browned, add ground beef – And brown that as well. Now usually I’m a big advocate of 80/20 – ie: 80% meat, 20% fat, but that’s for burger on the grill. here, you would want to get some nice, lean beef – the leaner the better. If you use very fatty beef, all of that fat will end up in your Chili, and you want to taste the Beef here. If you end up with too much juice for it to brown properly, pour that into your bowl as well.

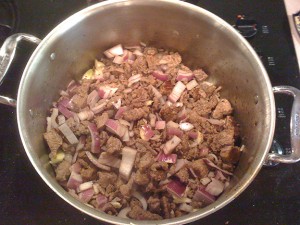
Meat and Onions- The start of any great dish!
Step 2: VEGGIES
When all of your meat is browned, thrown in 2 chopped onions – I use red onions, and to be honest you can use any that you want – Even halved pearl onions. Again, I chop these in different sizes – fine to meld into the Chili, and coarse so you can get a chunk with every bite. Oh, and a whole bulb of Garlic somehow always ends up in the put – Cloves skinned, then just smashed and thrown in there. I love it when they poke their head up when I am eating!
After that, I add 1 Large can of Tomatoes – I know, I usually beat the Fresh-Ingredient-Drum, but here you really should use canned – Unless, of course, you happen to have a bunch of big, beautiful, overripe tomatoes lying around, and even if you did, canned is probably better. Why?? Canned tomatoes break down better and have a brighter flavor. I know, it would seem counter-productive not to use fresh, but once you cook those fresh tomatoes down for a couple of hours, they will be nothing like what you started with. Besides, you should save those for something special, like TBM or Sandwiches.

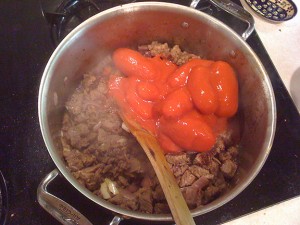
Beautiful Plums!
I like canned whole plum tomatoes – Preferably imported and not the generic supermarket variety. You could use the latter, but why not spend a couple of extra bucks – You’ll end up with a much brighter flavor. I throw those into the pot with all of their juice, and start to simmer. Spend another minute breaking those apart with a spoon – Not too much, as they will break down further as the chili cooks, and you do want bits of tomato swimming in there when you eat it.
The very last part of the veggie section has to do with Beef Stock. I know, it’s not a vegetable, but it is usually VERY NEAR THEM in the grocery store aisle, so I am including it in this section. Now I often make my own chicken stock, but I’ve never done it with beef – Not after that episode of Northern Exposure (remember that show?) where Adam makes the Demi-Glaze. Too much work, and remember, I am but only one step up from lazy than the butcher. Find a brand you like, buy it in those re-closable packages, and always have one on hand – Never used canned if you can help it. Pour a couple of cups in the pot till it looks right (so you can just start to see the liquid, but it doesn’t completely cover all the meat), then throw in your bowl of saved “Meat Juice”. Simmer for 1.5-2 hours or so, then season an hour before serving.
Step 3/Secret 2: SEASONING
This is where men get all Ga-Ga, if they aren’t already after using 2 different kinds of Beef. This is also where many of the secrets are hiding, and if asking someone about what they put in their Chili, this is the part that is probably whispered or possibly skipped altogether.
I’ll tell you my secret: I have no secret ingredients! My secret is compounding, and instead of textures, it is all about different levels of taste and flavor.
What you have so far is a pot of stew – And hardly any seasoning. It’s already very good – try it! If Chili really isn’t your thing, you could season with some salt and pepper and still have an awesome meal. But alas, that is not why you have been reading my ramblings for an hour and a half, is it?
Many folks would, at this point, grab some supermarket name-brand chili powder and season with that. After all, thats why these companies make that stuff – to season Chili, right? If you are now reaching for that little plastic bottle that has been sitting at the back of the cupboard for the past 8 years, do me a favor – Turn off the computer, take off your apron, and jump off the nearest bridge. Please. Oh, yeah, call your lawyer and put me or some nice charity in your Will first. THEN jump off that bridge.
We live in an age where the most fantastic foodstuffs can appear at our local grocery, high-end market, and on probably the best thing to be invented for foodies since the the dawn of time, the INTERNET. There is just NO REASON to settle for crappy spices. I buy Salt on the internet. Really, I do. Salt. Spend some time in the spice aisle at your local Whole Foods, Balducci’s Fresh Fields, Dean and Deluca, etc. Sure, these spices are expensive, but they are worth it. But the smallest container you can, unless you are sure you are going to use more, because spices will tire quickly, and be sure to write the date of when you opened the package on the outside. Therefore, you won’t be pondering “Is this the one I bought last month or when ‘DEVO’ was in the Top Ten?”
Personally, I get my chili powder from New Mexico, because I happen to be lucky and have Family there. But all of those markets I mentioned above have excellent varieties, and if you live under a rock, try Google. Now the chili powder that I buy is just that – Ground up dried chiles, nothing else, and usually comes in small cellophane bags. The little plastic bottles contain all sorts of other things, and can include cumin, garlic and onion powders, paprika, and lots of chemicals with long names that end in “-ose” and “-ate” and things you really don’t want to eat. Each chili powder is different, so start small – Put a half a tablespoon in there, stir, then taste. Keep adding and tasting until you feel a LITTLE heat.
At this point I add another ‘layer’ of spice. I like something hot, but different than the chili powder – and I believe the perfect ingredient is Chipotle. No, I am not talking about that wide-ranging fast-food restaurant that doesn’t even USE chipotles that I have seen – I am referring to the lowly Jalapeno pepper, smoked and elevated to greatness! Chipotles come in a variety of ways, from the dried pod itself, whole or powdered, to my favorite – canned in Adobo sauce. These are usually combined with vinegar, tomato sauce, and other things – Check the label when you buy to make sure there is nothing too nasty in there. I actually buy these at the supermarket, but again, all of the stores mentioned above should carry them, and buy the smallest cans you find.
You don’t want whole Chipotles in your Chili, so I grab a couple, put them in a bowl with some sauce, and use a fork to mash them up. Add them to the Chili the same way you added the powder earlier – Just a bit, stir, and taste. If you are stuck with just Chipotle powder, thats fine – But follow the same instructions. Keep adding more until your Chili is ALMOST as spicy as you want it. You are going to cook this for another half-to-full hour and let the flavor blend. If for some reason you didn’t stir enough and there are globs of chipotle in there, no worries – You’ve planned ahead and it won’t blow the top of your head off when you eat it.
As for other spices, go ahead and add what you like. Cumin is one of those flavors that you either Love or Hate – But be wary, a little goes a long way. Onion and Garlic powder? Not needed, as you’ve already used fresh. Paprika? Oregano? Go for it, just add whatever floats your boat. Just be careful adding anything with heat, such as ceyenne!
One quick not about thickening – We dusted the stew meat with flour, so there is already a bit in there – but if your Chili is too soupy, just mix a tablespoon of flour with a couple of tablespoons of chili juice (mmmm, I want THAT for breakfast in the morning!) in a bowl, and slowly add the slurry back in as you stir – that should take care of the problem. Don’t add too much, as it will turn out to be pasty.
After that last half-to-one hour, you are ALMOST ready to serve – Taste one last time, and add salt or whatever else you need, stir and serve. There are many things you can put out on the table for diners to add as they see fit – Cheese, sour cream, chopped onion, chopped cilantro, lime wedges (the last 2 will really freshen up your Chili!) You’ll also want something to sop up all the liquid as well – You can be lazy and serve saltine crackers, but my two favorites are cornbread or tortillas. Try adding some chopped bottled jalapenos to the cornbread as you make it for a bit of flavor (they are not as hot as fresh). To heat tortillas, I just turn on my gas burner to medium-low, and throw the tortilla right on there, turning it every 10 seconds or so until there are nice brown splotches all over. That way, it is somewhat crispy. Keep a bottle or 8 of Tabasco, Texas Pete, Cholula, or whatever your favorite brand of hot sauce is nearby so you can add yet another level of heat of you dare.
Congratulations, you are done! Cleanup is easy, as you’ve only used one pot, and be sure to store leftovers in an airtight container in the fridge for a few days or the freezer for a few months.
This recipe can be easily doubled, just be wary of the size of your pot. I love having leftovers for a simple lunch, a GREAT filling for omelettes, or even, in homage to my mother Debby, a quick appetizer: Cook 1 part Chili and 1 part cream cheese until warm and combined, then serve as dip with tortilla chips!
The Grocery list is simple, and I’ll lay it out for you since finding what I actually used above is probably like finding a needle in a haystack:
1 lb Stew Meat (or any cut of beef, cubed)
1 lb Lean Ground Beef
2 Red Onions
1 Bulb Garlic
1 28-oz Can Whole Plum Tomatoes
Beef Stock
Chili Powder
1 Can Chipotles in Adobo Sauce
Salt
And whatever else you want to add!
So thats it – No real secrets, no eye of rattlesnake or blood of newt, just simple ingredients. Feel free to experiment with whatever flavors you like!