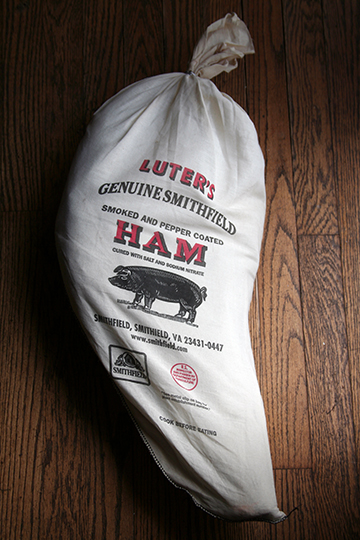
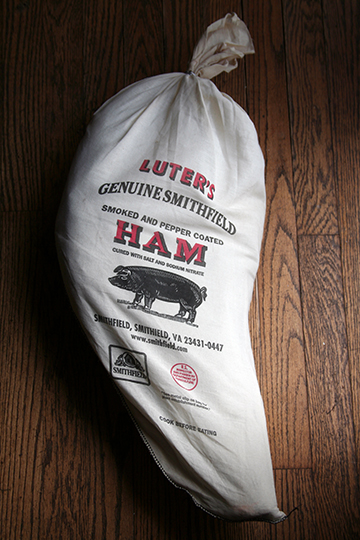
One of the great things about these hams is that since they are dry-cured, you can buy one and keep it for a while before cooking it. As for me, I just order mine on the internet. A couple of caveats when buying: Try not to be like me and buy the BIGGEST DARN HAM you can find. Remember, you are going to have to soak, cook, and deal with this thing – It’s MUCH easier when it is on the smaller side. When ordering via the Internet, you probably won’t have a choice – But you can always call them and request a smaller ham – They usually range from 10-14 Lbs. Secondly, if the high salt content turns you off, try a ‘Williamsburg’ ham – These are cured for shorter periods of time and thus have a milder salt taste.
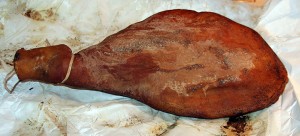
Keep the ham in it’s bag until ready to cook. 3-4 days before you plan to serve (more on that timetable later). Open the bag and remove the ham – It will be wrapped in butcher paper. The bags are usually closed with a metal staple – You can either bend this off with pliers or carefully cut the bag. You’ll want to hang on to the bag since it will have the cooking instructions on it. Next, remove the ham from the paper.
The first thing you may notice is some mold – DON’T FRET! This is normal. Check it carefully on both sides though – I once got a ham that had somehow got a chunk out of it – The mold had then worked its way inside the ham. This is not OK, and at this point return the ham (I have never heard of this happening to anyone else). The mold will normally not be able to penetrate the skin. You’ll want to wash the entire ham under cool running water, using a brush to scrub off any mold or blemishes.
The next step is the long one: Since the ham is cured with salt, you’ll need to soak it in water. See, at this point, what you have is basically a prosciutto. In fact, I have read of some that eat cured hams uncooked, just sliced thin. I’ll let the Italians make my prosciutto, thanks anyway! The salt will draw moisture out of the flesh, thus preserving it. Soaking will do two things: First, it will let some of the moisture back into the ham, and second, it will reduce the saltiness overall – You can think of this like a reverse-brine!
Now most instructions tell you to soak for 24-48 hours – I usually soak it for up to 72. The longer the soak, the less salt will be in the ham. Now I know what you are thinking: “How the HECK am I going to soak this thing?” Even my large turkey briners aren’t large enough to hold one of these hams. If you read Part 1 of this series, I mentioned using a hacksaw to get the ham to fit in a vessel the first time I tried it. Since then, I have come up with a better method.
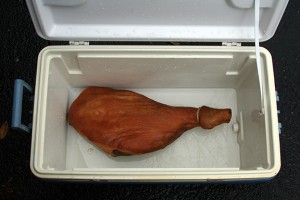
I use an Ice Chest to soak my hams – The large ones are more than big enough to hold them, and they have one added bonus. Since salt will continually be drawn out of the ham, you’ll need to change the water often, preferably every 12 hours. Most ice chests have a drain, and this will help considerably during the water changes. Alton Brown, host of “Good Eats” and Author, has a tip for brining turkeys that may work here as well – He uses one of those large water/drink dispensers seen on Football sidelines and construction sites – You know, the kind that usually ends up over a Football Coach’s head after a win. Finally, in a pinch, you could probably use a bathtub to soak a ham, although I’ve never done it. This is a VERY good time to mention the obvious – Make sure to thoroughly wash the vessel both before and after the soak! Store it somewhere cool while it soaks - I use the garage, as it is only a few steps from the outside to drain for the water changes.
Once the ham is done soaking, it is time to start cooking – The instructions state that the ham should be cooked for 25 minutes a pound, or until it reaches 163 degrees at it’s thickest part. My 18 pound ham should have been ready in 7.5 hours, and it was ready in 6 – So it is hard to plan to cook one of these for an event such as a party. My solution is to do this step the day before, and finally finish it the following day – Just make sure you build in this extra time in your planning and start your soak a day earlier.
There are two cooking methods that are recommended for Smithfield hams, but only one that is preferred by the producers – I’ve never used the “oven” method: Wrapping the ham in foil with some water and baking/steaming it, although it might be a good alternative if you don’t have a cooking vessel large enough. Someday, I will try this method and report back. The preferred method is to simmer the ham slowly in water – Nice and simple, but the fact remains that most folks don’t have a vessel that big. I used to use a large lobster pot, but that was big and unwieldy, and the ham had to go in at an angle.
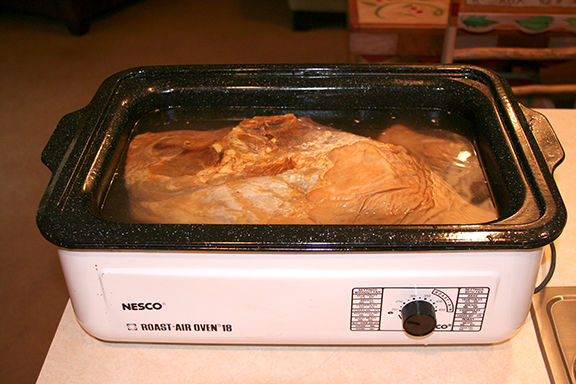
Enter my “MIL” – Many guys can’t handle their Mother-In-Laws – I couldn’t live without mine. Jane is awesome and loves to cook and eat as much as I do. A month before the first Thanksgiving dinner I ever cooked, she sent me a brand-new Nesco Roaster. This will fit up to a 22-lb turkey, and is a lifesaver for those of us that don’t have double ovens for the holidays or parties.
So a couple of hams ago (translation – years – Who says you can’t measure time with Pork Products?) I decided to try the Nesco for the ham and it worked beautifully. I put the ham in the enamel insert, fill almost to the top with water, set the temperature for 190-degrees, and wait. I do check the temperature of the water about every half-hour, as it does fluctuate – Just use an instant-read thermometer, as you’ll need one anyway to check the ham. Keep the cover on if possible, but check the water level as you want the ham to be submerged. Start checking with your instant-read every half-hour at least 2 hours before the ham is ‘supposed’ to be done, and remember, you are shooting for 163-degrees (heck, go for 165, it’s MUCH easier to read on the thermometer!)
I use the Nesco in the house for Turkey – We want the aromas to fill up the air and tempt the guests – But the ham smell can be salty, and in fact Leslie and I have named the boiling-ham aroma the “Wet-Dog Smell,” because, in fact, it sometimes smells like – you guessed it – wet dog. For this reason I usually use the Nesco in the garage, or at least the guest room – It ensures that folks don’t overstay their welcome….
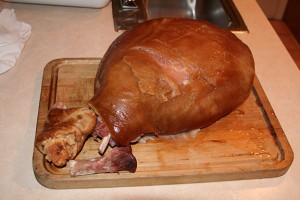
The ham will balloon up a bit, but not too much. These hams don’t look like your typical “tall” spiral-sliced ham – They are flatter and longer, even fully cooked. When you hit that magical 163-degree mark (at the ham’s fattest point), carefully lift the ham out of whatever vessel you use and put on a carving board to cool for at least a half-hour. The process of getting the ham up and out can be tricky – Use both hands and two people if you can, and don’t rely on the bones to support the ham – They can quickly pull away from the meat, sending the ham fat-end first back into the vessel, splashing you with hot ham-water in the process.
After a half-hour (and I even wait a bit longer), you’ll need to take the skin off the ham. This is pretty simple, as a sharp knife will glide through the skin and fat easily. You’ll need to be careful not to slice into the meat, so if you feel much resistance, stop and start again. Try to slice off just the skin and leave the fat on there – it will add to the flavor, and once you slice the ham, there won’t be much fat compared to the meat. The easiest way I have found to do this is slice off in strips and try not to take off too much at once. If you are finishing the ham the next day, you can wrap it in heavy foil and refrigerate until you are ready to proceed.
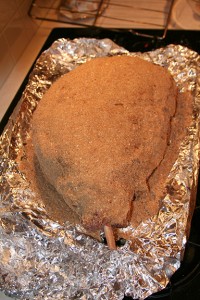
Glazing a ham is based on personal preference; Ingredients can include maple syrup, mustard, brown sugar, jelly, cola, whiskey, rum, and just about anything you can think of here – I’ll let you decide what you prefer, but I tend to stick to the recommendations from the Smithfield folks – I mix equal parts brown sugar and breadcrumbs and pat this onto the ham – It will create a nice ‘shell’ and the sweetness of the brown sugar complements the saltiness of the ham. Put the ham in a preheated 400-degree oven and cook for 20 minutes, or until the coating just starts to brown. If you prepared the ham the previous day, bring it up to room temperature prior to this step.
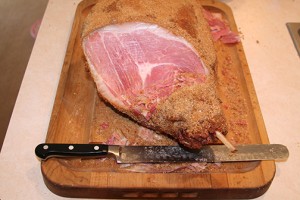
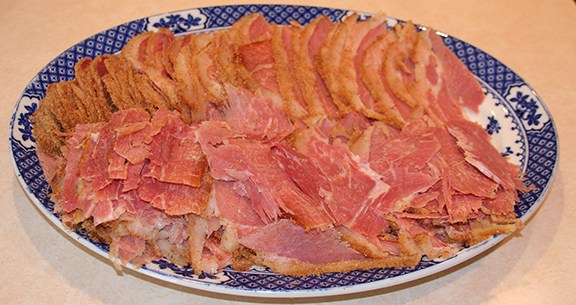
There is one last, yet very important step, to cover before serving and eating. As I mentioned before, the ham must be sliced very thin due to the salt content. Using your sharpest knife, slice from the top of the ham down to the bone a couple of inches from the small (hock) end. Then, start slicing thinly, increasing your angle and working your way up the ham. There is a bone here so you won’t be able to go all the way through – That is fine. Once you get near the other end of the ham, this will get harder as the other bones come in to play. Personally, once it gets too hard to slice, I go ahead and break down the rest of the ham, saving the bones for soup, throwing out any gnarly bits, and keeping the rest. I’ll continue to slice chunks once they are off the bone, and save some that have a lot of ‘grain’ to them to use in other recipes such as Ham Salad (aka Deviled Ham).
Ham biscuits, or ‘foldovers’ (Thanks, Roger!), are a common way to eat Smithfield Ham, but I’ll be posting a follow-up with other ideas for you. Unless you are throwing a huge party, you are going to have ALOT of leftovers, but that’s part of the fun!
